In some cases for maintenance or troubleshooting, we may ask you to access the inside of the connection panel on the FY500.
Please note: Opening the panel without our approval will invalidate your FY500 Warranty.
Tools required:
- 7mm spanner (or long-nose pliers)
- 2.5mm Allen key / Hex Key
- PH1 Screwdriver
IMPORTANT!
Before starting any maintenance ensure you have disconnected power from the FY500.
Disconnect the motor driver connectors
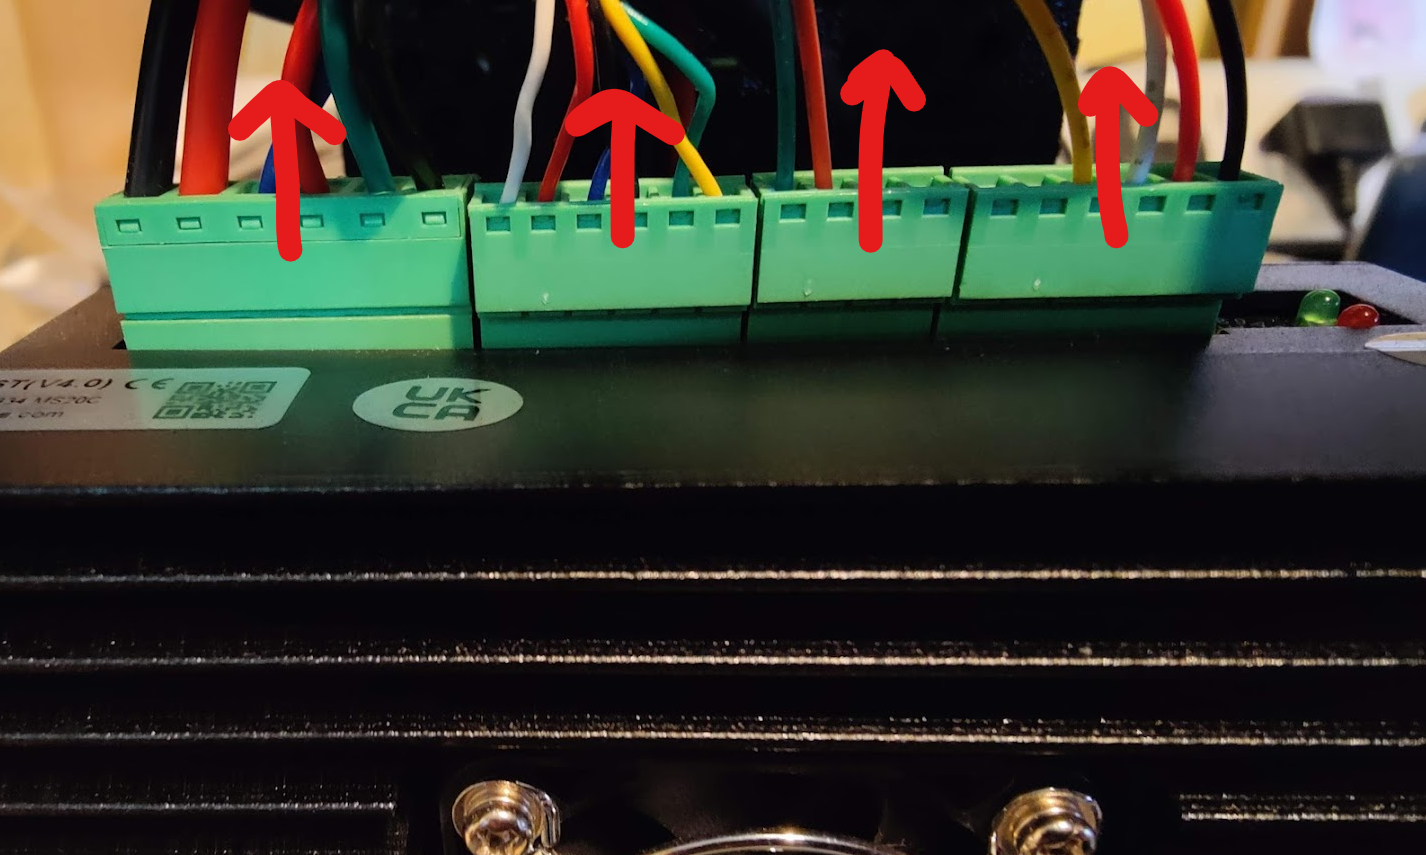
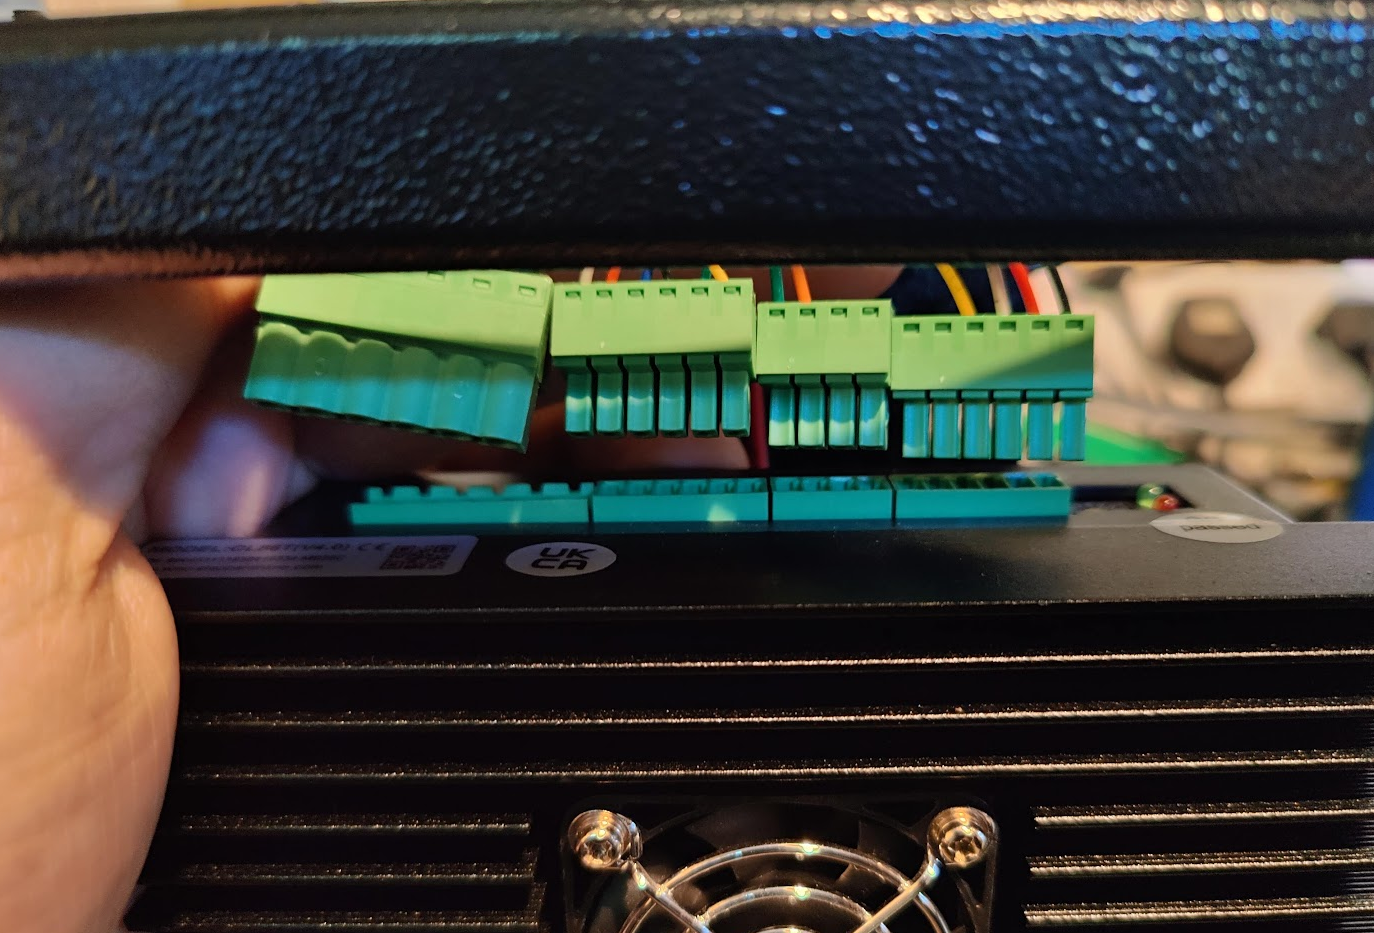
From the rear side of the machine, locate and gently work free the four green connectors on the top of the motor driver, and lift them upwards:
.png)
.png)
Remove the motor driver
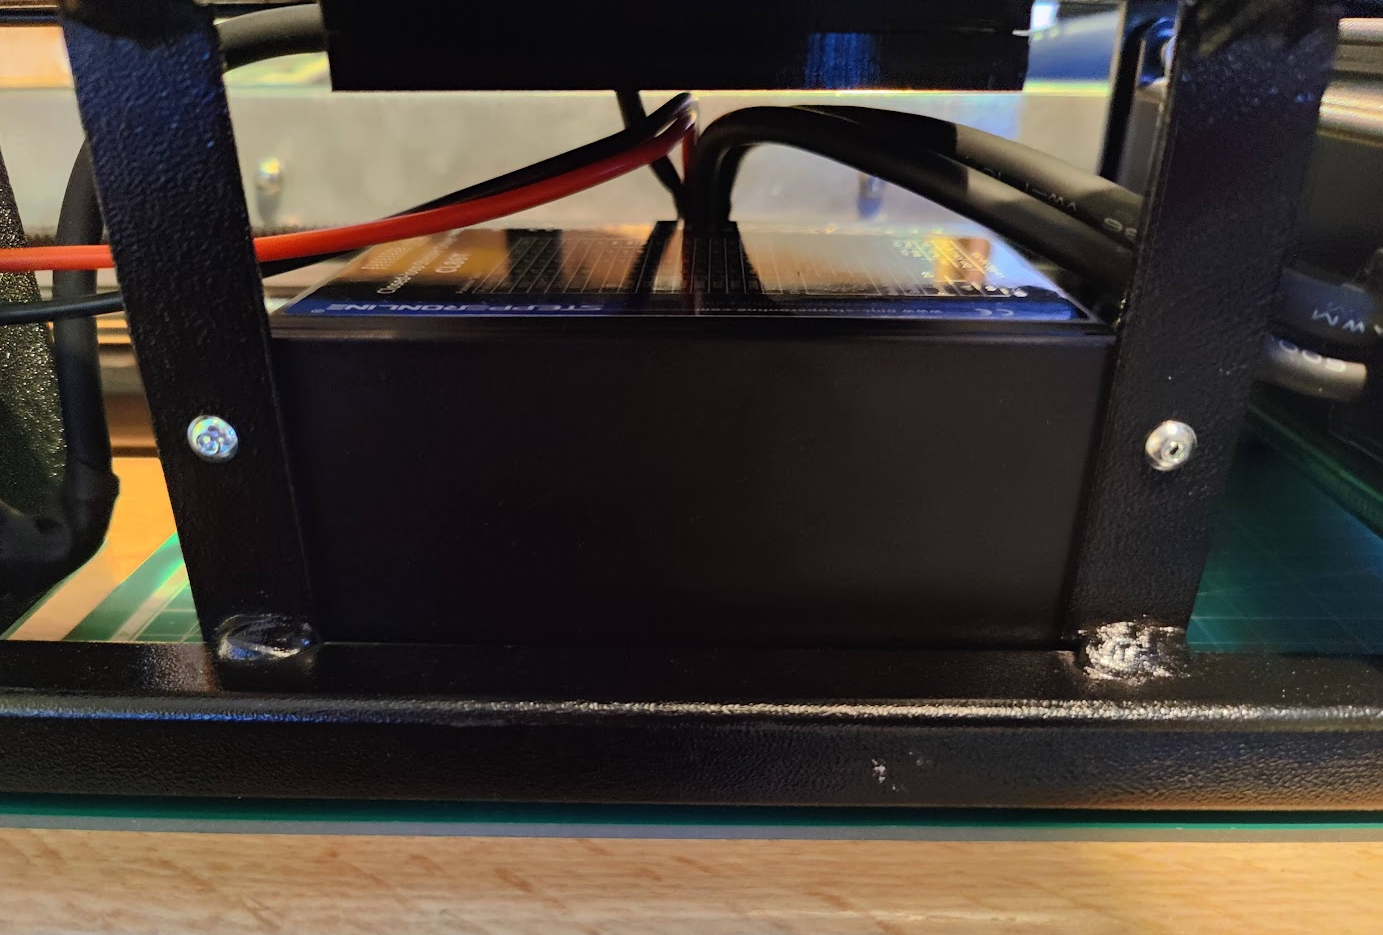
Flip the machine onto its side, with the connection panel facing upwards. This will allow you access to the two hex-head bolts on the underside that hold the driver in place.
.png)
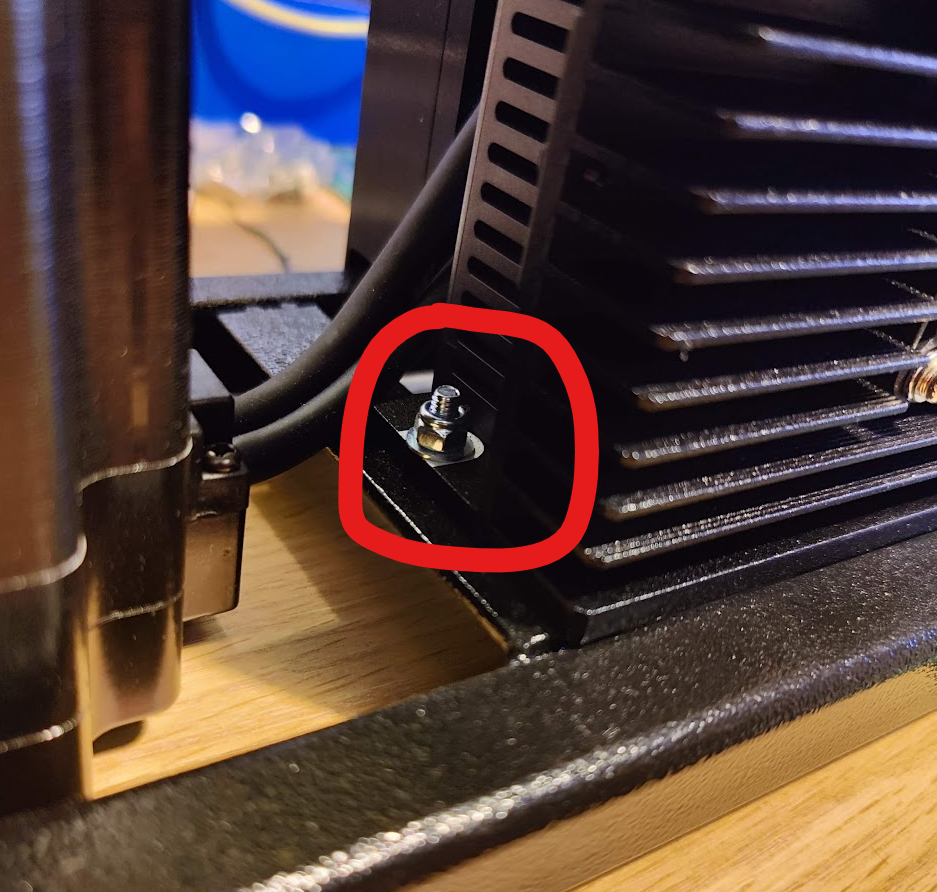
Using a 2.5mm hex key, and a 7mm spanner (if you have one - a pair of long nose pliers will work if need be), loosen off the front bolt:
.png)
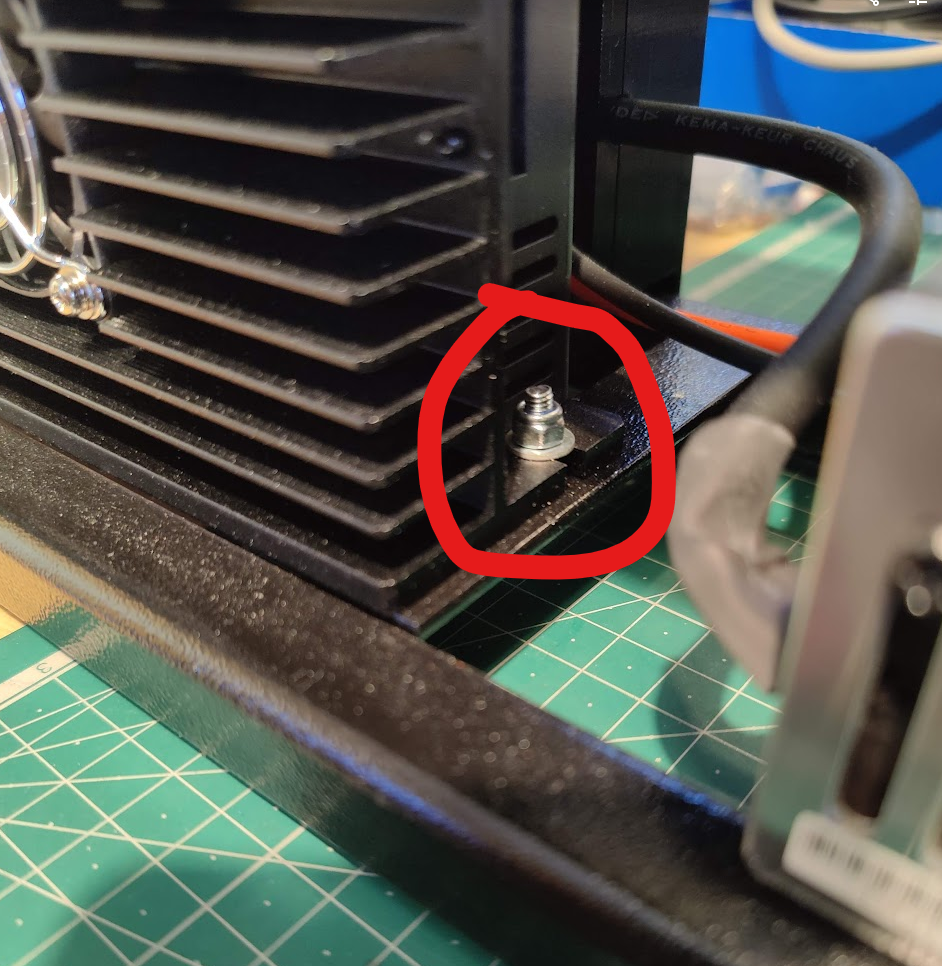
For the rear bolt, remove the nut, washers & bolt fully. Store them for later reassembly.
.png)
You can now carefully remove the motor driver.
As you remove it, release the cable-clip on the back of the driver to free the cables.
Remove the connection panel rear cover
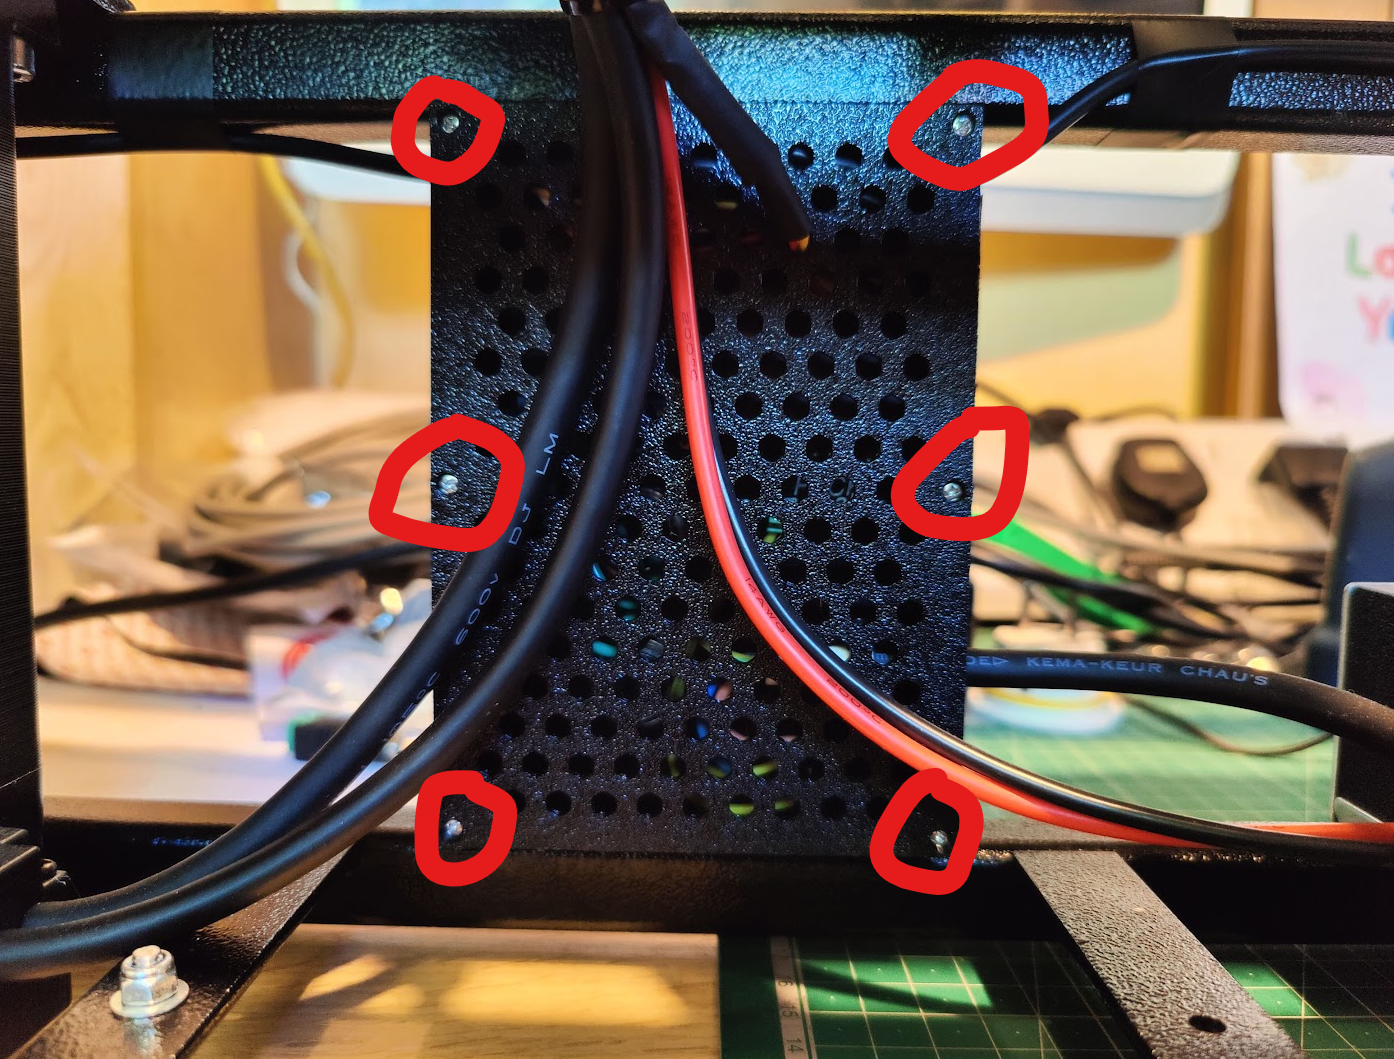
With the machine back upright, you can now access the 6 screws that hold the rear cover of the panel in place. Use a PH1 screwdriver to remove them:
.png)
Inside, you will find the panel PCB with the calibration sensors connected to it with 3 pin connectors, and the motor driver connector cable with a 6 pin connector.
Take note of which sensor is plugged into which connector, as they must not be connected backwards.
Reassembly
To re-assemble the FY500, follow the above steps in reverse.
If at any point you are unsure what to do, please contact support.
